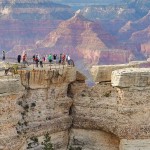
Hiking to the top of Half Dome is definitely a bucket list adventure that can be accomplished by the average hiker. All it takes is planning, maybe some endurance training, and a whole lot of mental motivation. Caution! This is an extremely difficult hike that will challenge your physical abilities. That being said, it is still extremely doable and an incredible experience to accomplish. In this story I’ll guide you through some first hand knowledge to help you make it to the top successfully!
The Hike: Half Dome via Mist Trail
Trail Details
- Length: 14.2 miles (round trip)
- Peak Elevation: 8,842 ft
- Gain/Loss: +4,800 ft
- Difficulty: Strenuous
- Time: 10-14 hours
- Location: Yosemite National Park
- Notes: Need permit to hike the cable section of the trail.
Preparation
There are a few things you need to prepare for or be aware of if your planning to conquer Half Dome. First off, make sure you’re in good physical shape. It’s a terrible thing to find out halfway up the hike that you don’t have the endurance to finish. Make sure you have done several practice hikes weeks before your trip. I practiced with a group of friends in the mountains of Southern California every other week before I went. We started off with a few shorter hikes (maybe 5 miles) and worked our way up to longer more strenuous hikes (around 12 miles). This will tone your legs, and get your heart conditioned for elevation gain. Speaking of gain, it’s good to get some practice on hikes that have a considerable elevation gain. You will find lots of switchbacks on these type of hikes which is perfect training for Half Dome.
The perfect tune to get you in the mood for this adventure:
Lottery Permits
No I’m not talking about the lottery that will make you a millionaire. I’m referring to the lottery system they now have in place that will allow you access to the Half Dome Summit. Back when I hiked Half Dome the lottery system didn’t exit. If you felt like going, you could just go. However with the crowds we experienced on the trail and more importantly on the summit, I can totally see why a lottery system can help out with crowd control. It can get so dangerous when too many people are trying to use the cables up to the summit. Now with the lottery permit system, there are only a maximum of 300 hikers per day allowed. I won’t go into all the details but you can find out more info from the NPS website.

Hiking Gear
Below I’ve listed items you will need to help you complete the hike. I’d consider these mandatory. Not having them could not only prevent you from reaching the summit, but could result in an undesired disaster.
- Water: 1 gallon recommended if hiking to the summit
- Hiking Boots: Broken-in good soled boots will prevent you from getting blisters
- Backpack: To carry camera, food, first aid kit
- Food: You’ll be burning lots of calories, so take plenty of food to replenish
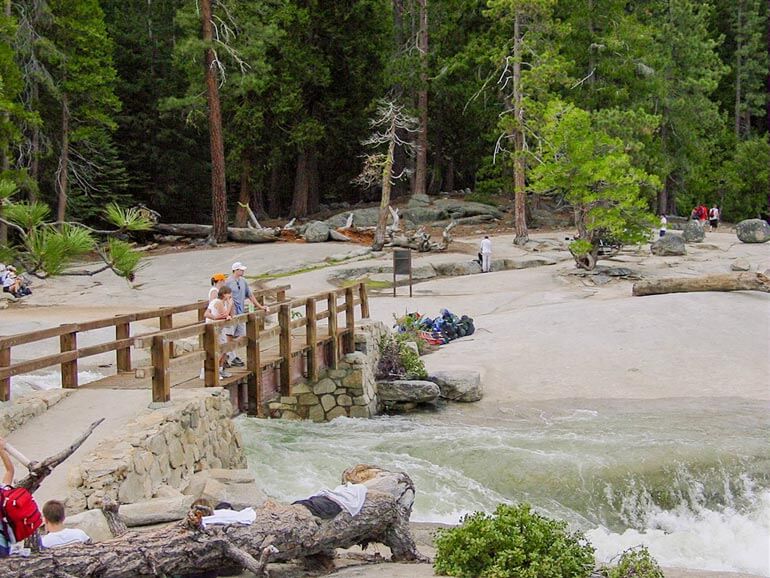
There is only one drinking fountain at the Vernal Falls Footbridge. Some hikers think they can get water from the rivers, but remember, this water often contains bacteria and needs to be purified. Forget the hassle and just take a water bladder like the kind you will find in a Camelbak hydration pack (doubles as a hiking backpack and water carrier). As for the boots, I can’t stress enough to have them broken in way before your hike. I’ve tried hiking with blisters and it can be excruciating pain when your boot is rubbing on raw open sores. No matter what…DO NOT try hiking this trail with tennis shoes. My brother hiked with a girlfriend once up to Vernal Falls and she was slipping and sliding all the way up and all the way down. He literally had to carry her on his back down the trail. Not very smart, and extremely dangerous. Don’t forget to bring a backpack to help carry your personal items.
There are a few other items that I wouldn’t consider mandatory, but still a very good idea to bring.
- Hat: To prevent sun damage or heat exhaustion in the summer
- Sunscreen: Actually this belongs in the mandatory list
- Hiking Socks: A light-weight hiking sock would help cushion your feet
- Proper clothing: Avoid cottons if possible and bring a sweater in case of a sudden change of weather
- Hiking Poles: Really helps to distribute your weight especially when coming down the mountain.
- Watch: To help you time your hike
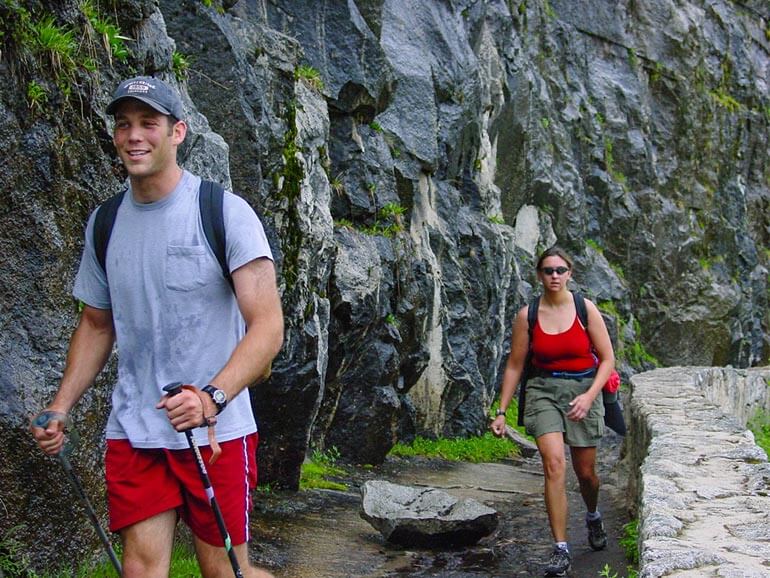
I think I took a cotton shirt and was regrettably wet with sweat for most of the trail. Cotton doesn’t dry fast so you could get really cold. I did have good hiking shorts though. Also I took an extra shirt and sweater because the weather was a little overcast and it did get cold at the top of the mountain. I didn’t have hiking poles on my journey, but my friend Ian did as you can see in the picture above. Turns out this was a good decision on his part because on the return trip, our legs felt like jelly and mine buckled several times causing me to clumsily stumble on the trail. Having those poles would have given me more support. Don’t forget to bring a watch so you can judge how long it took you to make it to some of the major checkpoints. That way you aren’t trying to attempt to climb the mountain too late in the day which could result in a dangerous hike back in the dark.
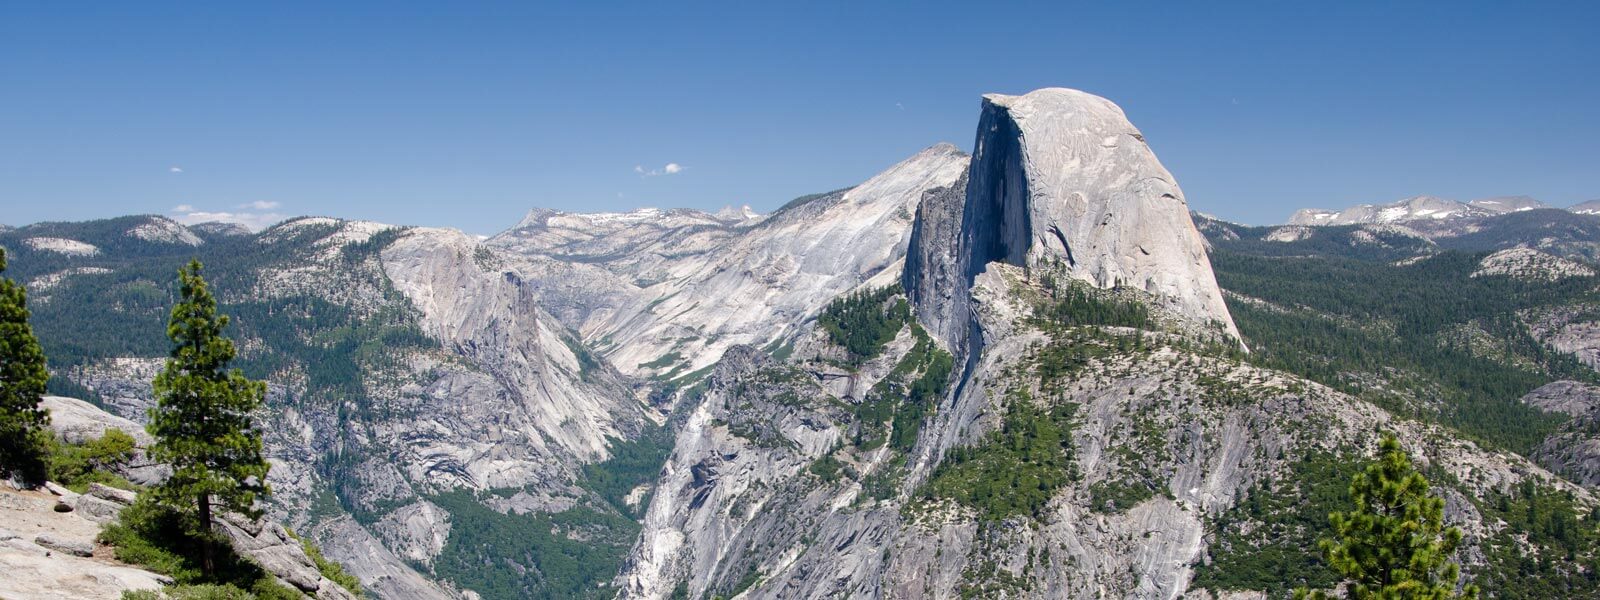
Choosing A Route
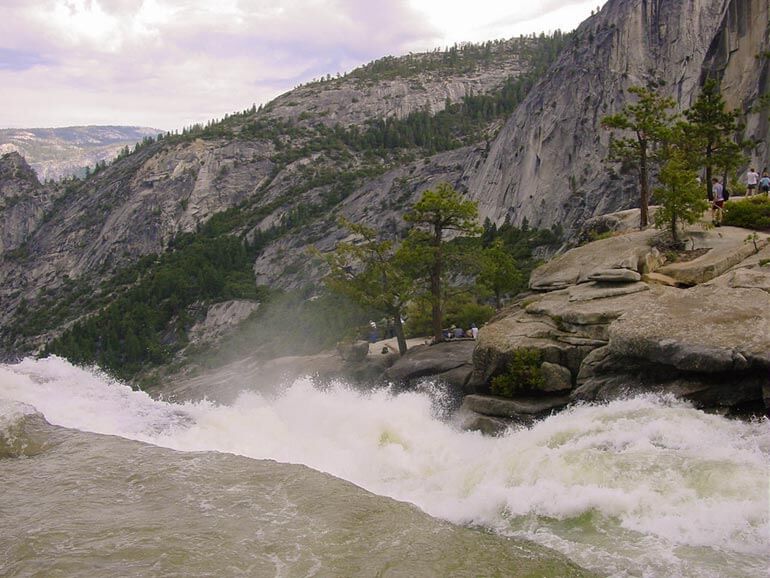
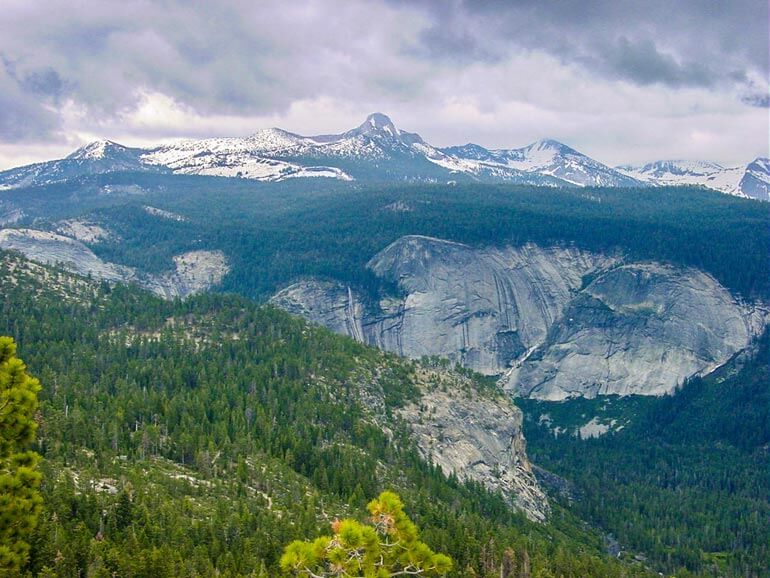
There are several routes you can take to reach Half Dome. The map and descriptions on the yosemitehikes.com website describe each route perfectly. The most difficult yet most scenic trail is the Mist Trail. For most of this trail you will travel along the side of the rushing Merced River. On the river side you will get a panorama view that reminded me of scenery right out of Lord Of The Rings. On the trail side you might see large dark granite walls, small brooks, and vibrant bright green moss. No matter where you look it is beautiful. The the last stretch up to Vernal Falls is a grueling hike since you must climb large granite steps carved into the cliff wall. If you choose the Mist Trail, the mist from the falls can make the trail wet and slippery so be careful. In the photograph above you can see how wet the Mist Trail was for us at one point. That’s where the good boots came in handy.
As indicated in the map above, we started out on the Mist Trail till we reached the first John Muir Trail Junction. We then chose to take the John Muir Trail from this point to avoid the steepest parts of the Mist Trail which would have definitely increased the difficulty in our hike. The John Muir trail is also difficult and has many switchbacks, but it is not as incredibly steep as the Mist Trail. On that note, if you don’t choose the Mist Trail this time, I suggest you return and at least hike to Nevada Falls via the Mist Trail someday. With the views I’ve described you won’t regret it.
Lunch At The Falls
As we ascended towards the next main checkpoint, Nevada Falls, I realized I was stopping literally at every switchback to take photographs. You will definitely be tempted to do this. And you should! Just watch the time so you don’t slow down too much. Nevada Falls is the perfect place to take a well-deserved lunch break. And you wont be the only ones. This is a popular turning point for lots of hikers who aren’t doing the full hike to Half Dome.
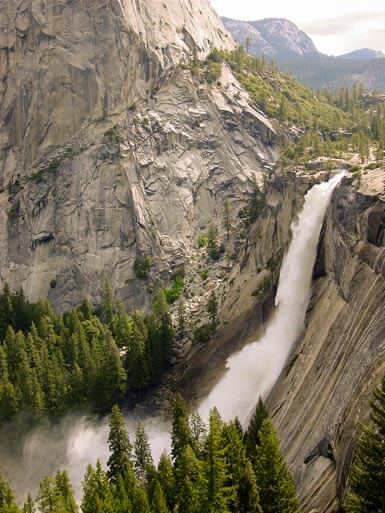
The Merced River is usually rushing fast during the summer months offering an incredible view of the falls. You can get pretty close and the photo opportunities are endless. A few years ago I heard a story of a hiker that wanted to take a picture from inside the water. She lost her footing and slipped in the raging river. I think a friend or family member tried to help her and fell in also. They both fell over the falls and their bodies were found later at the bottom. It’s a gruesome reminder that accidents can happen so just be cautious. The guard rails located next to the river and falls are there for your protection, so just be careful and you’ll have a great hike.
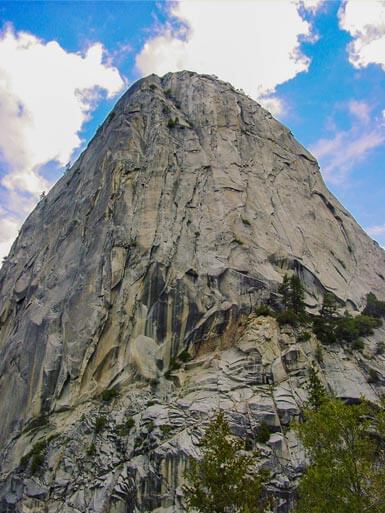
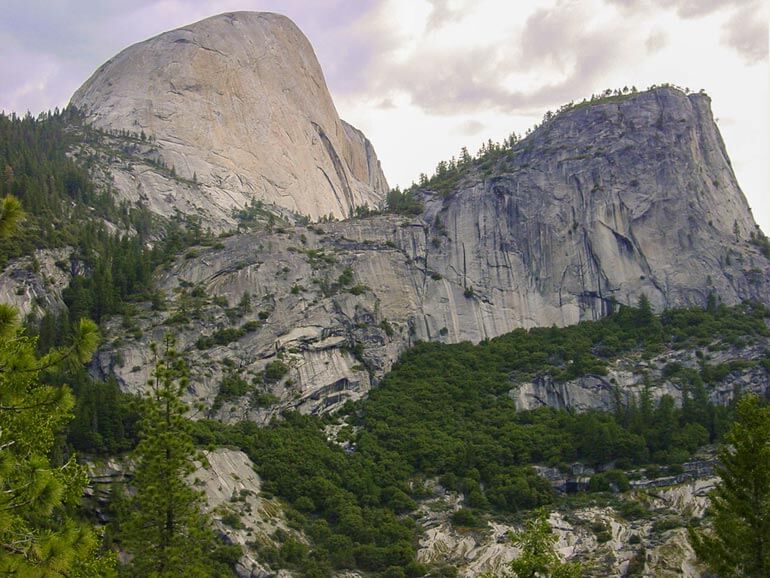
Final Push To The Subdome
After all that tough climbing you’ll enjoy the mostly flat hike through Little Yosemite Valley. The nice part about this is there are some pine trees to use as shade from the sun. But don’t get too used to it because once you reach the subdome just beneath Half Dome, you will start climbing again. The switchbacks here are pretty challenging. It’s incredibly steep and all exposed granite rock. This is where your mental motivation kicks in. I was pretty tired at this point and began taking more frequent water and rest breaks. I did get to snap more interesting pictures like the one below.
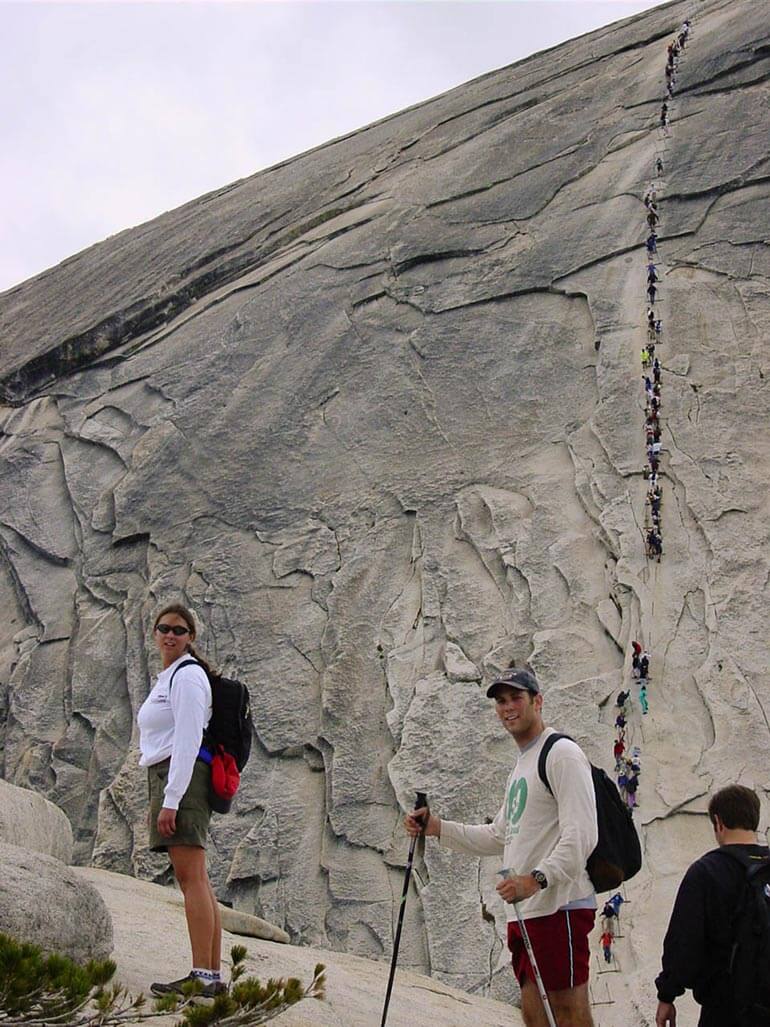
Once you complete the climb over the subdome you have made it! You are now at the foot of Half Dome and are ready to take on the crazy cable system of steps to the top. It’s a great idea to take another break at this point. For one, you really should enjoy the scenery. It is not an easy task to get to this point. I thought it was kind of cool to talk to some of the other hikers that were resting and admiring the sight of the climbers going up to Half Dome.
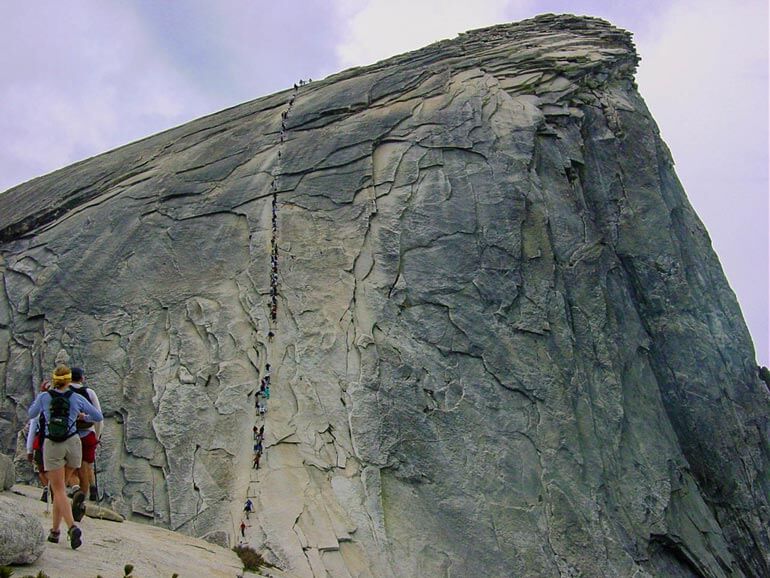
The crazy thing is when you really start looking at the people, they look like little ants. And the angle of the dome looks like they are climbing at a 90 degree angle. Well the climb actually takes you 400 vertical feet and only reaches a 45 degree angle. But that is scary enough let me tell you!
Using The Cables
My two hiking buddies, Debbie and Ian, wait for me to begin our final ascent of Half Dome. I didn’t realize it when we climbed, but you can borrow a set of used gloves from a box at the base of the dome. These gloves come in handy to help with gripping the cables and also to keep your hands warm since the cables can sometimes be cold.
The climb up the cables was to me the most adventurous part of this entire hike. First you will descend to cross a narrow saddle that is only about 20 feet wide. Then climb on the inside of the cable trail up to the top. This is not for the faint of heart. When we were climbing a woman freaked out halfway up and started crying. She was literally trembling. Her friends were trying to talk her out of her fear to keep her going. This is so dangerous because it slows down everyone who is beneath her. Again, use your mental motivation to conquer any fears! I was having a blast on the way up. It was not only a breathtaking experience but almost completely unbelievable. I felt like Spiderman clinging effortlessly to the ground. I shouldn’t say effortlessly. Some of the wooden beam steps are spaced quite far apart, so you have to use your grip on the cables to guide you safely up.
The best way to handle the cables are to stay on the inside. The people on the right lane are usually heading up, and the people on the left are usually heading down. Therefore it’s easier to just grip your side of the cable with both hands. By trying to stretch your arms across to both left and right cable, you would be using more of your chest muscles which can be harder and it can block people from descending. If someone needs to pass you because they are faster, let them. It’s not a race and everyone will get to the top eventually. When I climbed Half Dome there was no permit system so there was a huge crowd of people on the way back down. It was taking so long that we decided to descend on the outside of the cable. It’s not really recommended, but there really is no rule against it. I think now that there are limits on the number of hikers that can climb Half Dome, there aren’t any problems with crowds bunching up on the cables.
Reaching The Peak
You made it! Once you reach the top, not only will you be blasted away by the magnificent scenery of Yosemite National Park 360 degrees around you, but you will feel an incredible sense of accomplishment. Enjoy it for this is an incredibly adventurous hike. When we were at the top of Half Dome I saw a little brown creature that kind of looked like a beaver. Found out it’s actually called a Yellow-bellied Marmot. They are usually in this area and behave similar to squirrels so don’t be surprised if they try to beg for your food.
Notice the clouds in the picture above? Well, this is a bad sign. Those are storm clouds moving in and were getting closer by the minute. We decided to not take too much time at the top and get down the mountain asap. Since Half Dome is an exposed granite peak, it’s the perfect lightning rod. Back in 1985 five hikers experienced the full wrath mother nature had to offer when a series of lightning flashes hit the top of the mountain. A group friends had gotten to the base of Half Dome when they noticed storm clouds forming above. They decided to ignore the clouds and climb to the top. Quickly the storm closed in on them. They tried to seek shelter from a rock enclosure, but that did not help. Two strikes of lightning hit the dome. One of the hikers was struck by lightning on his head, went into convulsions and fell 4,000 feet to his death. Of the five, two were killed by the lightning and two suffered massive internal injuries and third degree burns. One tried to run and because he had limited contact with the ground when the lightning hit, he made it out with only minor injuries. You can read the full story in the book Shattered Air: A True Account of Catastrophe and Courage on Yosemite’s Half Dome written by Bob Madgic. There is a sign at the base of the Dome to remind hikers to be avoid hiking to the top if there are any storm clouds.
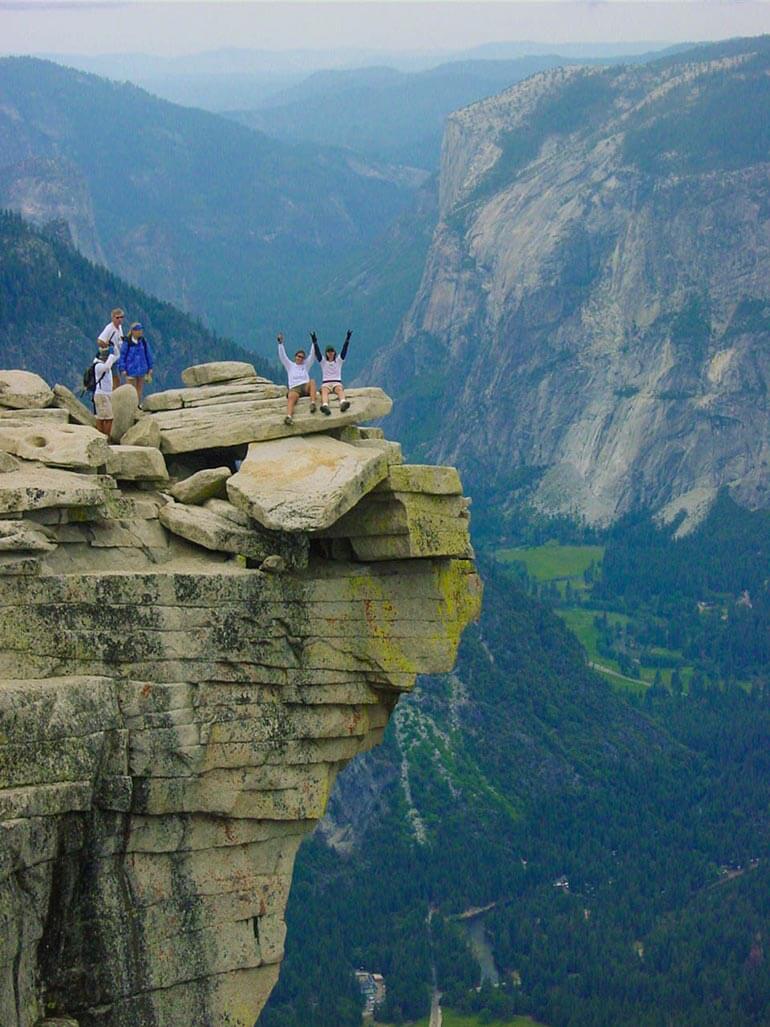
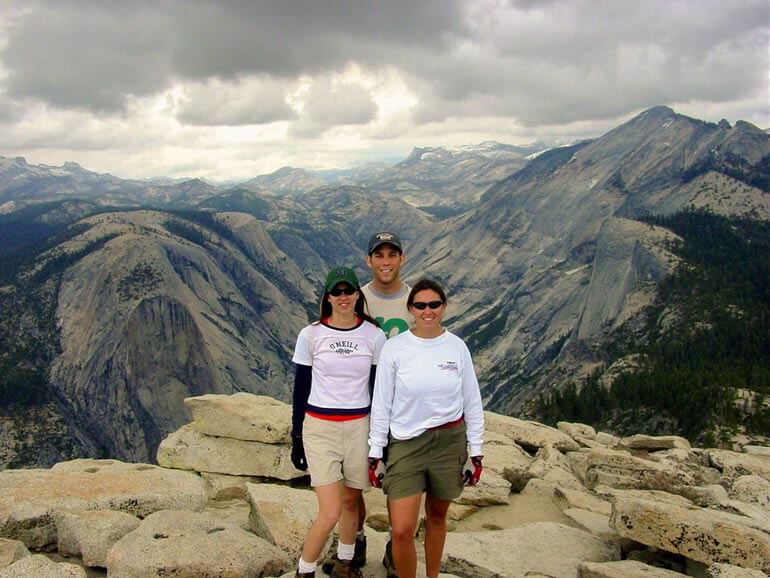
Let’s end this story on a good note though. I had a fabulously exhilarating adventure hiking Half Dome. As long as you take precaution you can have an incredible journey too. The hike back down was tough on the knees but we wound up completing the entire hike in a total of 8 hours. Below was one final celebratory shot at the extreme top edge of Half Dome. This journey was an experience I will never forget and I hope it will inspire you to try it someday too!